If you’re a React developer, you know how important it is to thoroughly test your applications to ensure they’re functioning as intended. Since the JavaScript world has many testing frameworks and libraries, it can be difficult to get started with testing.
Jest and React-Testing-Library are two popular tools that can help you effectively test your React applications. There exist other options too, in terms of runners (Mocha), or test rendering libraries (Enzyme), yet Jest and RTL is considered the standard pair for testing nowadays. In this article, we’ll explore how to use them together to create comprehensive tests for your React components.
For this article, I’m going to write tests for the implementation I’ve written for my previous article.
By the end of the article, you should be able to configure and write initial tests for a Next.js application.
Table of contents
Initial setup
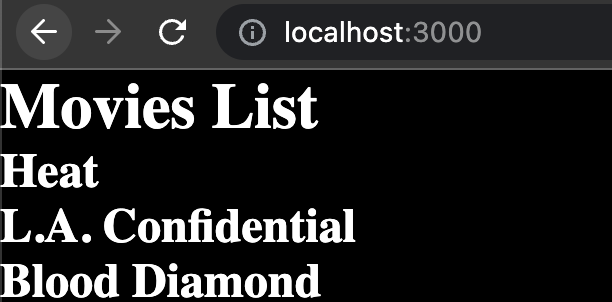
In order to get the application up and running, follow the instructions from the repository. Once the application has been bootstrapped, we’ll see the initial page that we have managed to render in the end of the last article.
Installing the required dependencies
As mentioned earlier, we’re going to use Jest and React Testing Library. Run the following command to install them:
npm install --save-dev jest @testing-library/react @testing-library/jest-dom jest-environment-jsdomBesides Jest and RTL, jest-dom is required for all the DOM related matchers we’re going to use. One example is the toBeInTheDocument matcher, which will be used to check whether some element can be found in the DOM.
On the other hand, jest-environment-jsdom is required to emulate the DOM in a Node environment. That is, the tests are running in a Node environment and they don’t have a browser that can render a document.
Configuration files
Next, we need to add the Jest base configuration file.
const nextJest = require("next/jest");

const createJestConfig = nextJest({
  // Provide the path to your Next.js app to load next.config.js and .env files in your test environment
  dir: "./",
});

// createJestConfig is exported this way to ensure that next/jest can load the Next.js config which is async
module.exports = createJestConfig();
This is the base foundation for Jest tests in Next.js apps, according to their official example. Since Next.js comes by default with SWC/Babel, we don’t have to add any other configuration files for now, it will know how to interpret the ES6-powered tests we’re going to write.
The tests
I usually consider there are 2 types of tests that can be created for front-end apps (that use a classic test runner, excluding the end-to-end ones):
- Logical tests. Typically, this category contains all the tests that don’t involve the DOM; these are the test that assert the logic of pure JavaScript functions or custom hooks.
- Tests that involve the DOM. Any test that involves rendering falls into this category.
Logical tests
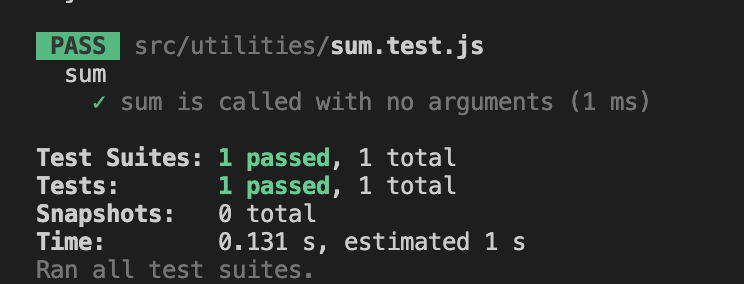
Having these said, let’s begin with a simple test file, where we’ll test the logic of a function that computes the sum of a variable number of arguments.
export default function sum(...values) {
  return values.reduce(
    (previousValue, currentValue) => previousValue + currentValue,
    0
  );
}
import sum from "./sum";
describe("sum", () => {
test("sum is called with no arguments", () => {
expect(sum()).toBe(0);
});
});In order to run all the tests in the application, run the following command:
npx jestIn order to integrate it with the other commands we have within the project, just add it in package.json (notice the “test” key).
"scripts": {
    "dev": "next dev",
    "build": "next build",
    "start": "next start",
    "lint": "next lint",
    "test": "jest"
},
Now, the tests can also be run using one of the following commands.
npm run test
npm test
npm t
As expected, our first test passes, yay!
We’re going to continue adding tests to our sum function until we consider it’s been fully tested. During this chapter, I’m going to experiment with different features of Jest.
import sum from "./sum";

describe("sum", () => {
  test("sum is called with no arguments", () => {
    expect(sum()).toBe(0);
  });

  test("sum is called with one argument", () => {
    expect(sum(10)).toBe(10);
    expect(sum(50)).toBe(50);
    expect(sum(1500)).toBe(1500);
  });
});
The second test case actually contains more than one case. Thus, a more proper way of writing it would be in separate test cases.
test("sum is called with 10 as argument", () => {
  expect(sum(10)).toBe(10);
});

test("sum is called with 50 as argument", () => {
  expect(sum(50)).toBe(50);
});

test("sum is called with 1500 as argument", () => {
  expect(sum(1500)).toBe(1500);
});
You can notice that they are really similar, the only difference is the provided argument. Thus, we could use test.each and rewrite the tests as follows.
test.each([10, 50, 1500])("sum is called with one argument", (sumArgument) => {
  expect(sum(sumArgument)).toBe(sumArgument);
});
We’re going to test the function with falsy values.
test.each([null, undefined, NaN, 0])(
  "falsy arguments are ignored",
  (sumArgument) => {
    expect(sum(sumArgument)).toBe(0);
  }
);
2 test cases are failing.

They fail since adding NaN or undefined yields NaN. In this case, we need to filter out the falsy values from the arguments.
export default function sum(...values) {
  return values
    .filter(Boolean)
    .reduce((previousValue, currentValue) => previousValue + currentValue, 0);
}
The tests are passing successfully now. We can even provide objects to test.each.
test.each([
  {
    input: [10, 20, 30],
    expected: 60,
  },
  {
    input: [NaN, undefined, 10, 15, 0],
    expected: 25,
  },
  {
    input: [1, 2, 3, 4, 5, 6, 7, 8, 9, 10, null],
    expected: 55,
  },
])("sum is called with multiple arguments", ({ input, expected }) => {
  expect(sum(...input)).toBe(expected);
});
Since we’ve covered many aspects of the logical tests for simple JS functions, we’re going to move to rendering tests.
Rendering tests
Checking rendered content
Let’s extract the rendering logic of the movies list to a separate component. This way, we can test it independently.
import PropTypes from "prop-types";

export default function MoviesList({ movies }) {
  return movies.map(({ id, title }) => <h2 key={id}>{title}</h2>);
}

MoviesList.propTypes = {
  movies: PropTypes.array,
};

MoviesList.defaultProps = {
  movies: [],
};
Then, we have to use it in our initial page, to keep the same UI as before.
...

export default function Home() {
  const { data: movies } = useQuery(moviesQueryKey, getMovies);

  return (
    <>
      <h1>Movies List</h1>
      <MoviesList movies={movies} />
    </>
  );
}

...
Now, we’re going to create the first test for the MoviesList component. It attempts to render the component using the render utility from RTL, then we’re expecting that it did not return null (thus, it rendered something to the screen).
import MoviesList from "./MoviesList";
import { render } from "@testing-library/react";

describe("MoviesList", () => {
  test("it renders", () => {
    const component = render(
      <MoviesList movies={[{ id: "1", title: "Foo" }]} />
    );
    expect(component).not.toBeNull();
  });
});
Running the test with npm t yields the following error. Earlier in the tutorial, when we configured jest using jest.config.js, we did not specify any test environment for the rendering tests.
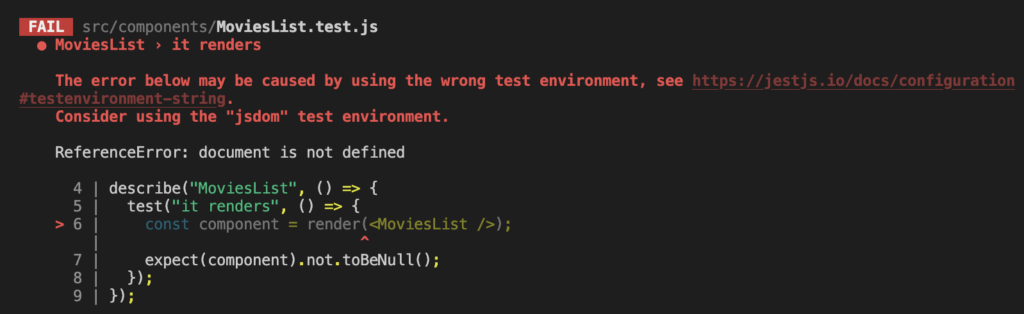
Testing React components is a lot more complex than testing simple functions, both in terms of configuration and the test’s actual logic.
In our case, the test complains that it has the wrong test environment (or none at all), which gives us a pretty good hint on what to do next.
Since the tests are run in a Node environment, it’s necessary to simulate the DOM; this is basically the role of jsdom. For more information regarding it, please check their official documentation.
const nextJest = require("next/jest");

const createJestConfig = nextJest({
  // Provide the path to your Next.js app to load next.config.js and .env files in your test environment
  dir: "./",
});

// Specify the custom configuration, which also contains the test environment
const customJestConfig = {
  testEnvironment: "jest-environment-jsdom",
};

// createJestConfig is exported this way to ensure that next/jest can load the Next.js config which is async
module.exports = createJestConfig(customJestConfig);
We’ve created a configuration object that specifies the test environment, then passed it as argument to the createJestConfig function.
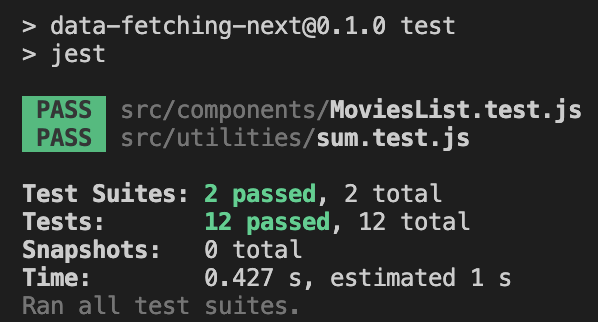
The test succeeds now. ✅
Next, let’s add a test that checks if the movie titles passed as props are actually rendered.
test("it renders the movies' titles", () => {
  const movies = [
    { id: "1", title: "Foo" },
    { id: "2", title: "Bar" },
    { id: "3", title: "Baz" },
  ];

  const component = render(<MoviesList movies={movies} />);
  expect(component.queryByText("Bar")).toBeInTheDocument();
});
Running it yields another error.

In this case, the problem is that we’re using a custom matcher (.toBeInTheDocument()) that was not already imported.
We’re going to create a new file, jest.setup.js, which will have its statements run on each test run, after the test environment has been resolved.
// Optional: configure or set up a testing framework before each test.
// If you delete this file, remove `setupFilesAfterEnv` from `jest.config.js`

// Learn more: https://github.com/testing-library/jest-dom
import '@testing-library/jest-dom/extend-expect'
Then reference it in jest.config.js.
...
const customJestConfig = {
  setupFilesAfterEnv: ["<rootDir>/jest.setup.js"],
  ...
};
...
The test passes now.
We can further extend the test to check the selector of the rendered text, and also include all titles.
test("it renders the movies' titles", () => {
  const movies = [
    { id: "1", title: "Foo" },
    { id: "2", title: "Bar" },
    { id: "3", title: "Baz" },
  ];

  const component = render(<MoviesList movies={movies} />);
  movies.forEach(({ title }) =>
    expect(
      component.queryByText(title, {
        selector: "h2",
      })
    ).toBeInTheDocument()
  );
});
Firing up events – interactivity testing
Let’s add a simple feature to our movies list component: the possibility of hiding or showing the actual list.
export default function MoviesList({ movies }) {
  const [isHidden, setHidden] = useState(false);
  return (
    <>
      <button onClick={() => setHidden(!isHidden)}>
        {isHidden ? "Show" : "Hide"}
      </button>
      {!isHidden && movies.map(({ id, title }) => <h2 key={id}>{title}</h2>)}
    </>
  );
}
Its corresponding test. I’ve extracted the assertions that check the movie titles to a new function, which has the possibility of negation.
At first, the list as rendered as the initial state of our isHidden boolean is false. Then, we look up for the button and click it using fireEvent.click. This method mimics a real user click on the Hide button. The click triggers a re-render of our component, which will not render anymore the movies list, while the button’s text will change to Show.
test("the list can be hidden/shown", () => {
  const movies = [
    { id: "1", title: "Foo" },
    { id: "2", title: "Bar" },
    { id: "3", title: "Baz" },
  ];

  const testMovieTitles = (shouldBePresent) => {
    movies.forEach(({ title }) => {
      const renderedTitle = component.queryByText(title, {
        selector: "h2",
      });

      if (shouldBePresent) {
        expect(renderedTitle).toBeInTheDocument();
      } else {
        expect(renderedTitle).not.toBeInTheDocument();
      }
    });
  };

  const component = render(<MoviesList movies={movies} />);
  expect(component.queryByText("Hide")).toBeInTheDocument();
  testMovieTitles(true);

  const showHideButton = component.queryByRole("button");

  fireEvent.click(showHideButton);
  expect(component.queryByText("Show")).toBeInTheDocument();
  testMovieTitles(false);

  fireEvent.click(showHideButton);
  expect(component.queryByText("Hide")).toBeInTheDocument();
  testMovieTitles(true);
});
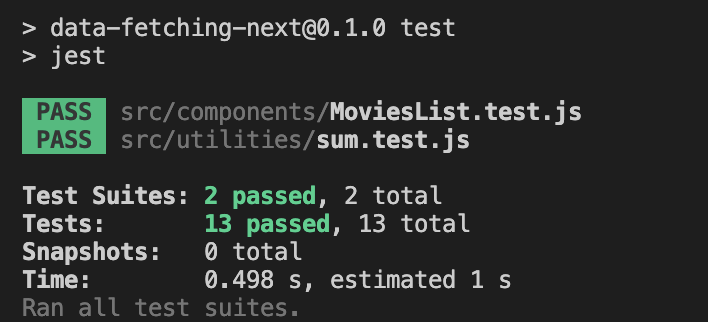
The test passes, as expected, this time without any additional configuration. 🙂

Wrapping up
That’s it for now. As the title suggests, this article serves as an introduction to testing. I’ve covered what I consider the base aspects of testing a React application. In my next article, I will continue this series and present more advanced testing concepts like:
- testing custom hooks
- querying for elements in a more populated DOM
- function spying
- other user events, besides
click - etc.
As usual, here is the link to the repository: https://github.com/ISilviu/testing-react-apps
References
- https://github.com/vercel/next.js/tree/canary/examples/with-jest
- https://nextjs.org/docs/pages/building-your-application/optimizing/testing
- https://testing-library.com/docs/react-testing-library/api/
Leave a Reply